Showing posts with label perforation. Show all posts

Saturday, November 17, 2012

Queensland 1 shilling mauve perforation 9.5

This issue is listed in the Stanley Gibbons Catalogue as SG 178, Mauve colour and priced at £250 mint and £65 used (2012 edition). It is Scott no 73.

In late 1883 or early 1884 (earliest known fiscal cancellation date is 29 December 1883) a very small number (the exact figure is unknown but was probably only a handful of sheets) of the Queensland 2nd sideface 1 shilling mauve was briefly issued with perforation 9.5 X 12 using the Queensland D 9½ Rotary Perforation Machine and the Queensland C Line 12 Perforation Machine. All the other 1 shilling 2nd sideface stamps were perforated using the Queensland C Line 12 Perforation Machine only.

The Queensland D 9½ Rotary Perforation Machine was a single-line machine of the rotary type, being operated by a wheel turned by hand or power. The machine gave large round holes, and as there were 48 holes in 100 mm, 96 holes in 200 mm, and 145 holes in 300 mm, the gauge works out at 9.6 and may be taken as 9½.

The D machine was obtained on 29th May, 1883 (Stanley Gibbons Monthly Journal, Vol. VI., page 157), and was installed in the Government Printing Office, as distinct from the lithographic office, for perforating the counterfoils of cheque books, etc.

According to Basset Hull this machine was only utilised when there was a stress of work on the C machine, and then only for the horizontal lines of perforation, possibly as a measure of control, as the sheets of stamps had to be taken outside the lithographic office to the Government Printing Office. The job was not wholly done at the Government Printing Office for security reasons.

However Edward D. E. van Weenan (1847-1925), writing in the Australian Philatelist, 25 May 1899, p. 112, gives a different account: “Anxious to know the reason of the 9 x 12 perforations, I also made enquiries and found out that the 9 perforating machine was at the time used for cheque books, and was used temporarily, it was surmised, during the repairing of one of the perforating machines. Only two or three sheets of the 1s value were thus perforated.” The flaw in Van Weenan's account is that these stamps were perforated 9.5 and 12, so both machines were used. That would not make sense if one of the machines was being repaired.

Robson Lowe states that “In 1884, to relieve pressure caused by sudden demands, a number of sheets were sent to Port Moresby, where they were perforated at 9.5 horizontally on a machine normally used for perforating cheques. The vertical perforations were done subsequently on the Hughes and Kimber machine gauging 12.” This is incorrect. The machine was NEVER sent to British New Guinea. As Leslie Hausburg noted in Gibbons Stamp Weekly vol 2, 1903, p. 346: “When in Brisbane early this year I went over the Government Stamp Printing Office, and there saw the 9.5 machine, and obtained a pull from it. The machine which was sent to British New Guinea was the older machine which perforated 13, and of which I managed to obtain a pull afterwards.”

The machine was actually sent to the bookbinding department about the same time (October, 1901) as the A machine was sent to British New Guinea, (Australian Journal of Philately, Vol. II., page 104, and the Australian Philatelist, Vol. VIII., page 102.)

Forgeries
As early as 1898 it was realised that this stamp had been forged. The matter was extensively covered in the Philatelic Press of the time and the full-text article that appeared in the London Philatelist, February 1903, pp. 35-38, covering this and other forgeries in some detail is available online here while a shorter article appeared in the London Philatelic Record, February 1892, p. 39 and is available here. Unfortunately no description was given on how this forgery was done or ways to detect it.

From Stanley Gibbons Monthly Journal 31 January 1903, p. 133 came this account from a Brisbane correspondent: “I have seen a specimen of the 1s. perf. 12, worked up with a fine chisel into a very passable imitation of a 9.5 x 12, but this was quite an innocent affair compared with another that was engineered on a sewing machine. I wish I could have got hold of some to send you, but the owners wanted big prices for them on account of their artistic merit."

I found this description on how perforations can be forged: “margins can be added / altered by taking both papers [i.e. the original stamp as well as the paper with the scarcer perforations - I assume for our purposes that this would be a cheap QLD stamp where the existing perforations have been removed and then reperforated 9.5 assuming there is enough space although each margin could be done separately] and feathering the edges together using sizing to attach them together. Sizing is the natural glue that occurs in all paper & is what holds paper together in the first place.”

It is suggested that there are two ways to detect this. One way is that usually these types of grafted fakes can be easily felt with fingertips. The other way is to use watermark fluid on the back of the stamp which can show these joins. Many fakers will also press the fakes in a hydraulic press to smash them flat. This can be seen when using watermark fluid for it penetrates the stamp very slowly as any "sizing" has been destroyed. Using a hydraulic press in this way is done to hide rebacks and added margins but also creases and filled thins."  However it has also been suggested to me that most forgers would not bother to graft paper to reperforate a stamp as it is not worth the effort. Instead they will just do a reperforation.

This extract below found on the web on detecting forged perforations covers United States stamps. However as both the US and Queensland issues were perforated using rotary perforation machines the information provided here should assist in detecting the Queensland forgeries as well. 
However remember that in the United States they used two different rotary perforators when perforating stamps. i.e. when perforating a rectangular stamp the first operator would put it through one way then the second operator would do the other direction with its different spacing. Therefore they didn't need to change the spacing. In Queensland, the rotary perforation machine was used for one direction, then the other direction was done with a guillotine line perforation machine. 


“Rotary perforators were used to perforate early U.S. stamps. These machines used a series of perforating wheels with equally spaced pins that would roughly puncture the paper as it was fed through. A private perforating machine uses a 'stroke' perforation method where the pins on a head plate descend vertically through the paper into matching holes in a counter plate. Because of these different methods of perforating stamps, official perforations have a different appearance than private perforations. Official perforation holes are more oval in shape and less clean cut than private perforations. Real perforations normally have tufts of paper fibres extending into the holes that were not cleanly cut away. Also, holes created by the rotary perforating wheel were in the shape of an ellipse or oval rather than a perfect circle. Another characteristic of genuine perforations is that the rows of perforations applied to a sheet of stamps were always parallel. They may have not been always perfectly aligned with the border of the stamp design, but they were parallel. If a row of perforations was slightly askew at the top of a stamp, it would be equally askew at the bottom also.

There are two general categories of private perforating machines. The first category I would label 'crude' and the second I would call 'refined.' A refined reperforator will create holes with the correct size hole (as in diameter) and the correct 'gauge.' The gauge refers to the number of holes per inch. Fortunately, even a 'refined' reperforator will create circular rather than elliptical holes and holes that are also clean cut. So although the size and gauge will be exactly correct, the appearance and shape of some of the holes themselves will not be. A professional reperforator may use tiny cylindrical files to rough up the hole's edges so they don't have such a clean appearance, but they are still distinguishable from real holes in most cases. In a series of real perforation holes the tufts of extending paper fibres are usually in the same relative position in the holes, e.g., left, right, top, bottom, etc. On the other hand, a 'crude' reperforating machine often produces rows of holes that do not form a perfectly straight line. In addition they often do not create holes of the correct size or gauge.”

Other ways to detect forgeries would be by examining the perforations knowing that a rotary perforator will make slightly oblong punches which cannot be duplicated by a vertical punch, which will be how all forgeries must be made. Also, there will be a definite 'flow' to the perforation in the direction of travel of the perforator. There will be long paper fibres left in the direction of travel, and short fibres perpendicular to it. A vertical punch will leave paper fibres the same length in all directions. 


So your first test in determining if it is a forgery will be whether the stamp is the right size, not too short or too high. Next tests are whether the perforations are parallel, size of holes, whether clean cut, are they in a straight line and (last test because it is the hardest) do they exhibit rotary perforation characteristics, with a slight oval and paper fibres in the right place.


Here are some examples of this issue. Many of these examples as well as information on this stamp have come from an extensive discussion on this topic on stampboards.com here. Where the stamps are thought to be forgeries I have indicated this.

This is a pull from the original D 9½ Rotary Perforation Machine. All the genuine perforation 9.5 stamps should have perforations looking like this.

This is one of several copies in my possession. It passed the watermark test and is considered to be genuine.

Earliest known usage, 29 December 1883. Courtesy of Dave Elsmore

My 2nd copy. Fiscally cancelled Brisbane. Appears genuine

My third copy. Postally used

 Seen on an auction site

Spink Auction: 11018 - Spring Collector's Series 
Lot: 416 x Queensland 1884 Sideface, perf. 9 1/2x12 1/- mauve, unused with part gum; with slight soiling, repaired at right). The vertical sizing and perforations are all wrong, most probably a forgery.

Another copy sourced from the web, again the perforations are wrong, so most likely a forgery.

 Sourced from Stampboards.com 

Sourced from Stampboards.com 

6 copies  courtesy of Dave Elsmore. The 2nd from right on the bottom row may be a forgery

This example was seen at Premier Postal auction no 99 lot no 1551

A fourth example from my collection with a fiscal cancellation

This example was seen at Phoenix auction no 9

Seen at Phoenix no 44 

Seen at Spink Auction: 8005 Lot: 868  

Seen at Status Stamp auction in 2017. 1 shilling mauve

Seen at Status Stamp auction in late 2017. 1 shilling mauve


My 5th copy, with ray numeral 33 (Mackay)


My 6th copy. Brisbane parcel post cancel. Appears to be genuine

My 7th copy. Appears to be genuine


Seen on Ebay in April 2025. When compared with the Bassett Hull pull (on left) it appears to have been repurfed at bottom and the edges of the perforation are too regular and the paper fibres have been disturbed at the tips. Probably fake

This is a very poorly executed fake seen on Ebay in November 2012. The barred numeral is also fake
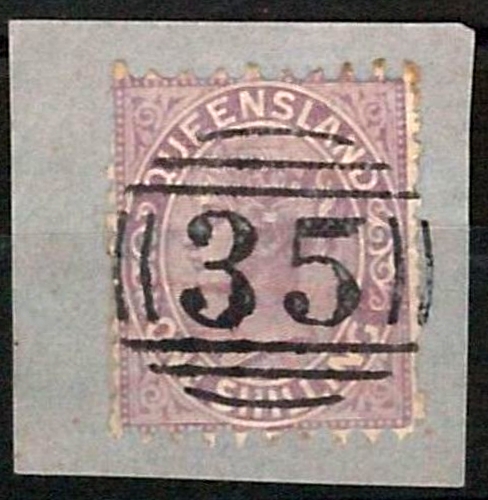
And a second example seen on Ebay in November 2015, with the same fake barred numeral

Tuesday, November 13, 2012

Queensland 1 shilling perforation varieties

With one very rare exception, all the Queensland 2nd sideface 1 shilling  stamps were perforated using the same The C Line 12 Perforation Machine. The gauge was from 12 to 12¼, however, there were several small lengths of holes gauging 12½ in a section of about 17.8 cm from one end of the line.

This post concerns itself not so much with the exact perforation but rather the strikingly different ways this perforation looked like and the reasons for this. In other words, how is it possible for the one machine to exhibit such a large variation in the way it perforated stamps?

The single line or guillotine machine consisted of a bar fitted with needles (punches) generally accurately spaced, which when the bar dropped fitted into holes in the bed of the machine. It was worked by treadle; the sheet or sheets of stamps being placed on the bed, and the bar or guillotine when descended cut out one row of perforations which extended right across the sheet.

When first used, provided the needles fit accurately into the holes in the bed, the machine will perforate with large clean cut holes. As the needles wear, or the edges of the holes in the bed become worn, the perforations are smaller and the edges rough and broken; it is then that the renewal of needles and bed needs to be undertaken. New needles are placed in the bar to gauge as before; they are accurately spaced, generally by means of a vernier; a flat plate of iron for the bed is taken, thinly coated with wax, and upon this an impression of the needles in the bar is made, holes are drilled where the impressions show and the plate is then case hardened, i.e., it is heated and then plunged into cold water or oil.

The machine therefore ranged from producing large round clean-cut holes, the discs of paper being usually removed on all four sides of the stamp to producing a distinct rough of “fluffy” perforation.

The main reason was that an old and worn perforation head is far less sharp than a new one. You may get sharp holes one week and blunter ones the following week yet the same gauge and machine is used. A bit like shaving with a month old blade versus a new one. Once the needles were renewed the whole process would start over again, with clean cut holes gradually becoming more worn and fluffy.

Other reasons could exacerbate this process. For example, the quality and 'weave' of the paper. If it was used for a few shipments of paper, any change, change of supplier, even in the source trees used, could have caused a different perforation fluff cut as well as blunt perforation tip end. If a different gauge of thickness pin, (depending on supply), was used, very different results could be seen despite it still being gauge 12.

Another factor was how many sheets were perforated at the same time. Fewer sheets at a time would equate to cleaner holes, while more sheets would equate to fluffier holes.

In other words, there could be an almost infinite variation from "New Pins / Crisp Paper / few sheets" to "Worn Pins / Woolly Paper, more sheets." And as my examples below show, the differences really were very marked. 

This is a "pull" from the C Line 12 Perforation Machine that was used for the 1 shilling 2nd sideface issue

Here are some examples from my collection of clean cut perforations:


And here are some "fluffy" examples from my collection:


And finally here are some pairs from my collection showing sharp and fluffy perforations and what the corresponding holes look like in the middle of the pairs.


Friday, November 2, 2012

Queensland D 9½ Rotary Perforation Machine

This extract on the B1 Buncle Comb 12½ Perforation Machine is taken from The Postage Stamps of Queensland by A.F. Basset Hull, 1930, pp. 48-9. In the 1880s a few sheets of the 1d., 2d. and 1/- were perforated by this machine.

This was a single-line machine of the rotary type, being operated by a wheel turned by hand or power. The machine gave large round holes, and as there were 48 holes in 100 mm., 96 holes in 200 mm., and 145 holes in 300 mm., the gauge works out at 9-6 and may be taken as 9½.

The D machine was obtained on 29th May, 1883 (Stanley Gibbons Monthly Journal, Vol. VI., page 157), and was installed in the Government Printing Office, as distinct from the lithographic office, for perforating the counterfoils of cheque books, etc.

This machine was only utilised when there was a stress of work on the C machine, and then only for the horizontal lines of perforation, possibly as a measure of control, as the sheets of stamps had to be taken outside the lithographic office for the purpose.

Mr. Dalby in the Philatelic Journal of Great Britain, Vol. XXIII, page 94, states that in 1884 a number of sheets of the 1d. were operated on by this machine. This date is confirmed by a fiscally-used copy, which has been seen, dated 30th August, 1884, but he makes no mention of the 2d. and 1s., which were also similarly treated.

At a later date a few sheets of the 2d. modified 1882 type received the horizontal perforation 9½, a copy of which has been seen, dated in September, 1887.

These are the only occasions of the official use of this machine for perforating postage stamps. The 1897 1d., figures in all four corners, was for some time listed with perforation 12 x 9½, but this perforation was entirely irregular.

It has frequently been stated that the D machine was sent to British New Guinea, but that this is incorrect was pointed out by Mr. Hausburg in the London Philatelist, Vol. XIV., page 252. The machine was actually sent to the bookbinding department about the same time (October, 1901) as the A machine was sent to British New Guinea, (Australian Journal of Philately, Vol. II., page 104, and the Australian Philatelist, Vol. VIII., page 102.)


Perforation pull for the  D 9½  Rotary Perforation Machine

Thursday, November 1, 2012

Queensland B1 Buncle Comb 12.75 Perforation Machine

This extract on the B1 Buncle Comb 12.75 Perforation Machine is taken from The Postage Stamps of Queensland by A.F. Basset Hull, 1930, pp. 46-7. It was widely used on Queensland 2nd sideface stamps from 1890 onwards.

This machine was obtained in 1890 from J. Buncle & Co., of Melbourne, who presumably carried out the work of conversion from an existing B single-line machine.


In this machine the long line of holes measures 12¾ inches, and as there are 64 holes in 100 mm., 128 holes in 200 mm., and 192 holes in 300 mm., the gauge is 12-8, which is practically 12¼, and is regular throughout the line. Not counting the hole in the back of the comb, each of the thirteen teeth contains 13 holes gauging 12¾. Thus the gauge of the machine may be said to be 12¾ x 12¾. The machine was operated by a treadle.

At first the B1 machine gave small clean-cut holes. Towards the end of 1895 or beginning of 1896 the machine had become worn, and was fitted with larger pins, for we find a large hole perforation in the stamps in use about that time.

The B1 machine seems to have been brought into use about the beginning of April, 1890, since the earliest postmark date of a copy, the ld., perforated by this machine is 8th April, 1890, as recorded in the Stamp Collector’s Fortnightly, Vol. IV., page 139.

The machine was used to perforate the vertical columns of stamps in the sheet, and at each end of the long line of holes there were certain spare holes which partly perforated the upper and lower margins, and so facilitated the separation of stamps from the sheet. At first there were nine spare holes at each end of the line, subsequently reduced to seven, possibly owing to the sheets coming apart too readily in the former case.

Now, imagine this vertical comb, with teeth to right, operating on a sheet and working from right to left. On the first stroke of the machine the teeth will perforate the right margin of the sheet, and the back of the comb will perforate the right edges of the column of stamps, and also partly perforate the upper and lower margins. The next stroke of the machine will complete the perforation of the right column of stamps, and so on to the completion of the perforation of the left column of stamps.

Thus the sheet will have the impressions completely perforated, the top and bottom margins being partly perforated through, as also one of the side margins, the other side margin being left intact.

In January, 1895, when the thick Beer Duty paper was being used provisionally, great inconvenience was experienced in the first supplies to the General Post Office by the difficulty in separating stamps in consequence of the side margin which had not been perforated. This was remedied by turning the sheet round and passing it through the machine again, the back of the comb perforating the vertical line a second time, and the teeth perforating the margin.

The convenience of this practice was at once recognised and the procedure adopted for future use. Thus all sheets of stamps subsequent to January, 1895, show a vertical double line of perforation on one of the side margins. Cases are known in which the perforation of the side margin has been overlooked, but these are extremely uncommon.

The B1 comb machine, commonly known as the Buncle machine, was in use from 1890 onwards; in fact it was seen in actual working by a member of the Committee early in 1924.


Perforation pull for the B1 Buncle Comb 12.75 Perforation Machine

Sunday, August 19, 2012

Queensland 2nd Sideface Perforation 9½ article

This article was written by C. S. Graham in the Queensland Philatelic Review between 1923 - 1926.

The 9 ½ x 12 Perforations of Queensland, 1882 issues. 
By C. S. GRAHAM, Esq. 

"The information regarding these issues which is available to the ordinary collector is so small that I venture this article in the hope that it will lead some more experienced collector to give us the benefit of his wider experience through the columns of this Magazine.

Gibbons’ 'catalogues, the "spot “penny (No. 176), two types of (Nos. 177 and 183), and 1/- type  11a (No. 178). 

These are perforated 9½ horizontally and 12 vertically, but there are other variations not yet listed.

I have one specimen of No. 176 perforated 9½ at top and 12 at bottom and sides, another 12 at top and bottom and 9½ at sides, and yet  another perforated 9½ on one side only, showing that the 9½ perforation  not done regularly in horizontal  vertical rows. 

A specimen of 178 (1/-) shows the 9½ perforation at bottom and three parts of the way across the top, the remaining portion being perforated a distinct 12, with typical small holes. 

In view of the very erratic perforation which characterised Queensland issues at about this period, I cannot help thinking that these examples point to the 9½ perforation having been done, either by the Post Office or by some other Government department,  as an after process on certain sheets where the perforation was defective. 

A specimen of No. 166 ("spot” 1d.), (of full size and with fair margins), imperforate on, three sides and part perforated on the other, lends further evidence to  this theory.

Gibbons notes No. 179, ld. type 12 (no spot after "penny"), as occurring imperforate but does not catalogue the 9½ X 12 perforation  of which I have a specimen and of which several examples are held by local collectors.

There are probably other varieties in the albums of our members, and the recognition and listing of these will depend to a great extent on the information from those who are fortunate enough to possess them.

One of the objects of the Queensland Philatelic Society is the preparation of a full catalogue of Queensland stamps, and the co-operation of members will be heartily welcomed." 

Graham's theory that these stamps perforated "either by the Post Office or by some other Government department, as an after process on certain sheets where the perforation was defective" is incorrect. This perforation machine was used due to increased demand. As Badger wrote in the Australian Stamp Monthly in 1936 (P. 134), "When there was an unusual stress of work, a single line machine of the rotary type was used for the horizontal row of perforations. The perforation was just over 9.5, making the stamps perforated by it, perf 9.5 x 12." 

Nevertheless Graham is partly right in that while the perf 12's were done in the normal manner in the normal location, the horizontal perf 9.5 was done at the Government Printing Office. The job was not wholly done at the Government Printing Office for reasons of control.

This machine was a rotary single-line wheel machine, perforating large round clean-cut holes gauging 9.5. It was obtained by the Queensland Government on 29 May 1883. Some accounts refer to it being sent to British New Guinea but according to Hausberg writing in 1906, as well as my own knowledge of New Guinea during this period, this is incorrect.

Wednesday, May 2, 2012

Queensland 2 shilling brown - perforation, watermark and paper

PAPER: Two types of paper were used. The first type was produced by De La Rue and was an intense white, more or less coarse and crinkly with little or no graining apparent from the back surface and was used until April 1896 when the second paper was produced by Alexander Cowan and sons following the transfer of the contract to them. It was a wove paper, not as white as the first, smooth to the touch and with a graining very apparent from the back surface. The watermarks for both types of papers were the same, Stanley Gibbons type 6, crown over Q, first introduced in 1879, and the same dandy-roll was used for both.


Stanley Gibbons type 6, crown over Q watermark

The De La Rue paper was used for both the 1889 and 1890 issues while the Cowan paper would have been used for the later printings of the 1890 issue as the paper was only received in around May 1896 and was used from August of that year. The Cowan paper was supplied in books of 500 sheets each of 120 watermarks. The placement of the watermark is very haphazard, occuring all over  the stamp. On the right hand stamp below, for eample, the watermark is in the bottom left-hand corner, whereas on the left hand stamp it is in the centre, fractionally over to the right.


The difference between the two papers is really quite marked. On the left is the Cowan paper  and on the right the De La Rue paper, which is noticeably whiter. When you have examples of both in front of you it is possible to see the difference from the colour alone.
On the left is the Cowan wove paper with the De La Rue paper on the right. The stamp on the left has graining whereas the stamp on the right has none, being smooth to the touch. For further information on the De La Rue Crown Q (2nd Type) Paper see here and for the Cowan Crown Q paper, see here.

PERFORATION: For the 1889 issue the perforation 12 was from a single line machine manufactured by Messrs. Hughes and Kimber, London and obtained in January 1874. In 1890 the new vertical comb-perforating machine gauging almost exactly 12.75 x 12.75 was introduced. It was obtained from J. Buncle & Co., Melbourne. The perforations are designated by Stanley Gibbons as 12.5, 13. 
It appears that these machines were used interchangeably as I have many examples of the perf line 12 machine being used on stamps with the Cowan paper. For further information on the Hughes and Kimber single line machine see here, for the Buncle comb-perforating machine see here.


Perforation 12 line

Perforation 12.75 Comb